This guide is only of relevance if you have the promotion module in effectmanager.
The advantage of uploading sales-in to effectmanager is that it gives you the possibility to evaluate the expected sales in vs. actual sales in on promotions in order to improve the forecast accuracy. Sales-in is normally exported from your ERP system or other planning tools.
If you need a guide that shows you how to import Sales In from your ERP system, please see our guide How to automatically import Sales In from your ERP system
Uploading Sales In
You can maintain Sales In per Product or Sales In per Chain. Go to settings in effectmanager, in the sidebar menu press Sales per Product or Sales per Chain.
You can also correct Sales In for a single product or chain in effectmanager, please see our guide How to maintain sales figures in effectmanager
Both Sales per Product and Sales per Chain are set up with the same Export file.
In the top window, you see your Consumer Units and Units, and in the bottom window is a sales table.
🔴OBS! Sales In is maintained on Consumer Units and is imported to promotions on Delivery Units. If you have a GS1 integration with effectmanager, you must maintain Sales In on Delivery Units.
1. In the sales tables window, select the following and finish by pressing Export.
- Sales-In
- Period
- Level of the export (Daily, Weekly, Monthly, Yearly)

2. In a pop-up window, select the Chain(s) and Product Group(s) you wish to export, finish by pressing Export.
If nothing is selected, effectmanager will export all chains and all product groups.
NB! The Sales file is exported on a chain and product level.
👍Pro-Tip:If you check off Select Only Active you will only see active products with active chains in the file.
If a product is still active but deactivated on the Retail Chain, it will not be in the export file.

3. In the Excel file, the first three lines will indicate the type of export, the exported period, and what level.
NB! Do not make corrections to these fields.
When importing the sales file, column J and onward must be filled out with your Sales-In.


4. When you have filled out your Sales file save it and import it to effectmanager.
In the sales tables window, press Import.

5. In the pop-up window, find your file by pressing Browse and then press Upload.
A new pop-up informs you that the import has started.

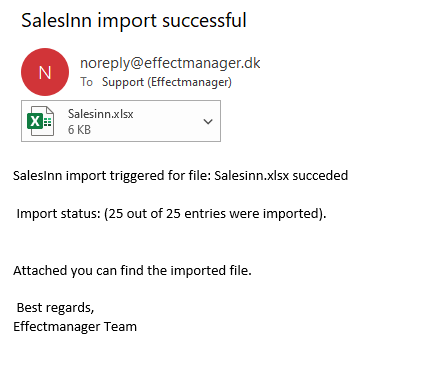
6. When the import has completed, you will receive an email notification.
Your Sales In is now imported to effectmanager. When you import a new Sales file, we recommend that you update the affected promotions with the newest sales figures.
If you need a guide that shows you how to import the latest sales figures to your promotions, please see our guide How to update promotions Sales Figures
Download our printer-friendly guide here